
DiffEdit
DiffEdit
![]()

Image editing typically requires providing a mask of the area to be edited. DiffEdit automatically generates the mask for you based on a text query, making it easier overall to create a mask without image editing software. The DiffEdit algorithm works in three steps:
the diffusion model denoises an image conditioned on some query text and reference text which produces different noise estimates for different areas of the image; the difference is used to infer a mask to identify which area of the image needs to be changed to match the query text
the input image is encoded into latent space with DDIM
the latents are decoded with the diffusion model conditioned on the text query, using the mask as a guide such that pixels outside the mask remain the same as in the input image
This guide will show you how to use DiffEdit to edit images without manually creating a mask.
Before you begin, make sure you have the following libraries installed:
Copied
# uncomment to install the necessary libraries in Colab
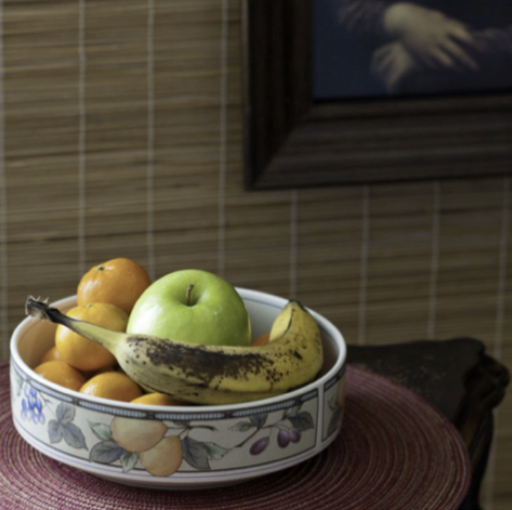
#!pip install diffusers transformers accelerate safetensorsThe StableDiffusionDiffEditPipeline requires an image mask and a set of partially inverted latents. The image mask is generated from the generate_mask() function, and includes two parameters, source_prompt and target_prompt. These parameters determine what to edit in the image. For example, if you want to change a bowl of fruits to a bowl of pears, then:
Copied
source_prompt = "a bowl of fruits"
target_prompt = "a bowl of pears"
The partially inverted latents are generated from the invert() function, and it is generally a good idea to include a prompt or caption describing the image to help guide the inverse latent sampling process. The caption can often be your source_prompt, but feel free to experiment with other text descriptions!
Let’s load the pipeline, scheduler, inverse scheduler, and enable some optimizations to reduce memory usage:
Copied
Load the image to edit:
Copied
Use the generate_mask() function to generate the image mask. You’ll need to pass it the source_prompt and target_prompt to specify what to edit in the image:
Copied
Next, create the inverted latents and pass it a caption describing the image:
Copied
Finally, pass the image mask and inverted latents to the pipeline. The target_prompt becomes the prompt now, and the source_prompt is used as the negative_prompt:
Copied

Generate source and target embeddings
The source and target embeddings can be automatically generated with the Flan-T5 model instead of creating them manually.
Load the Flan-T5 model and tokenizer from the 🌍 Transformers library:
Copied
Provide some initial text to prompt the model to generate the source and target prompts.
Copied
Next, create a utility function to generate the prompts:
Copied
Check out the generation strategy guide if you’re interested in learning more about strategies for generating different quality text.
Load the text encoder model used by the StableDiffusionDiffEditPipeline to encode the text. You’ll use the text encoder to compute the text embeddings:
Copied
Finally, pass the embeddings to the generate_mask() and invert() functions, and pipeline to generate the image:
Copied
Generate a caption for inversion
While you can use the source_prompt as a caption to help generate the partially inverted latents, you can also use the BLIP model to automatically generate a caption.
Load the BLIP model and processor from the 🌍 Transformers library:
Copied
Create a utility function to generate a caption from the input image:
Copied
Load an input image and generate a caption for it using the generate_caption function:
Copied
Now you can drop the caption into the invert() function to generate the partially inverted latents!
Last updated