BOINC AI Hub
  • 🌍BOINC AI Hub
  • 🌍Repositories
  • Getting Started with Repositories
  • Repository Settings
  • Pull Requests & Discussions
  • Notifications
  • Collections
  • 🌍Webhooks
    • How-to: Automatic fine-tuning with Auto-Train
    • How-to: Build a Discussion bot based on BLOOM
    • How-to: Create automatic metadata quality reports
  • Repository size recommendations
  • Next Steps
  • Licenses
  • 🌍Models
  • The Model Hub
  • 🌍Model Cards
    • Annotated Model Card
    • Carbon Emissions
    • Model Card Guidebook
    • Landscape Analysis
  • Gated Models
  • Uploading Models
  • Downloading Models
  • 🌍Integrated Libraries
    • Adapter Transformers
    • AllenNLP
    • Asteroid
    • Diffusers
    • ESPnet
    • fastai
    • Flair
    • Keras
    • ML-Agents
    • PaddleNLP
    • RL-Baselines3-Zoo
    • Sample Factory
    • Sentence Transformers
    • spaCy
    • SpanMarker
    • SpeechBrain
    • Stable-Baselines3
    • Stanza
    • TensorBoard
    • timm
    • Transformers
    • Transformers.js
  • 🌍Model Widgets
    • Widget Examples
  • Inference API docs
  • Frequently Asked Questions
  • 🌍Advanced Topics
    • Integrate a library with the Hub
    • Tasks
  • 🌍Datasets
  • Datasets Overview
  • Dataset Cards
  • Gated Datasets
  • Dataset Viewer
  • Using Datasets
  • Adding New Datasets
  • 🌍Spaces
  • 🌍Spaces Overview
    • Handling Spaces Dependencies
    • Spaces Settings
    • Using Spaces for Organization Cards
  • Spaces GPU Upgrades
  • Spaces Persistent Storage
  • Gradio Spaces
  • Streamlit Spaces
  • Static HTML Spaces
  • 🌍Docker Spaces
    • Your first Docker Spaces
    • Example Docker Spaces
    • Argilla on Spaces
    • Label Studio on Spaces
    • Aim on Space
    • Livebook on Spaces
    • Shiny on Spaces
    • ZenML on Spaces
    • Panel on Spaces
    • ChatUI on Spaces
    • Tabby on Spaces
  • Embed your Space
  • Run Spaces with Docker
  • Spaces Configuration Reference
  • Sign-In with BA button
  • Spaces Changelog
  • 🌍Advanced Topics
    • Using OpenCV in Spaces
    • More ways to create Spaces
    • Managing Spaces with Github Actions
    • Custom Python Spaces
    • How to Add a Space to ArXiv
    • Cookie limitations in Spaces
  • 🌍Other
  • 🌍Organizations
    • Managing Organizations
    • Organization Cards
    • Access Control in Organizations
  • Billing
  • 🌍Security
    • User Access Tokens
    • Git over SSH
    • Signing Commits with GPG
    • Single Sign-On (SSO)
    • Malware Scanning
    • Pickle Scanning
    • Secrets Scanning
  • Moderation
  • Paper Pages
  • Search
  • Digital Object Identifier (DOI)
  • Hub API Endpoints
  • Sign-In with BA
Powered by GitBook
On this page
  • Uploading models
  • Using the web interface
  • Using Git
  • Using the boincai_hub client library

Uploading Models

PreviousGated ModelsNextDownloading Models

Last updated 1 year ago

Uploading models

To upload models to the Hub, you’ll need to create an account at . Models on the Hub are , which give you versioning, branches, discoverability and sharing features, integration with over a dozen libraries, and more! You have control over what you want to upload to your repository, which could include checkpoints, configs, and any other files.

You can link repositories with an individual, such as , or with an organization, such as . Organizations can collect models related to a company, community, or library! If you choose an organization, the model will be featured on the organization’s page, and every member of the organization will have the ability to contribute to the repository. You can create a new organization .

There are several ways to upload models to the Hub, described below. We suggest adding a to your repo to document your model.

Using the web interface

To create a brand new model repository, visit . Then follow these steps:

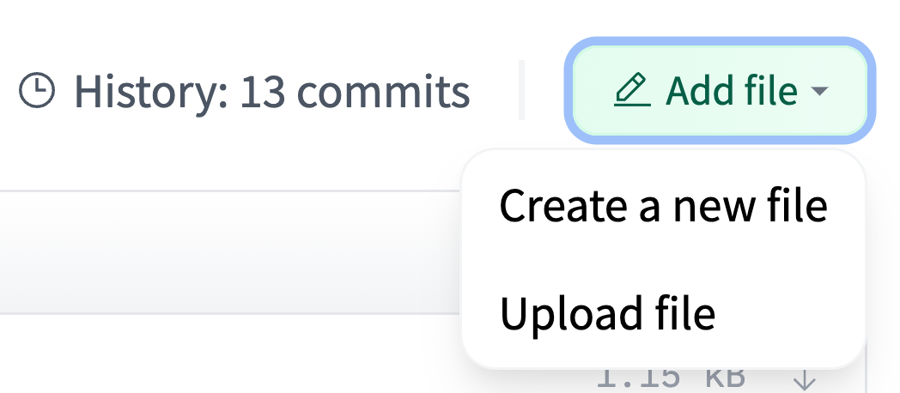
  1. In the “Files and versions” tab, select “Add File” and specify “Upload File”:
  1. From there, select a file from your computer to upload and leave a helpful commit message to know what you are uploading:
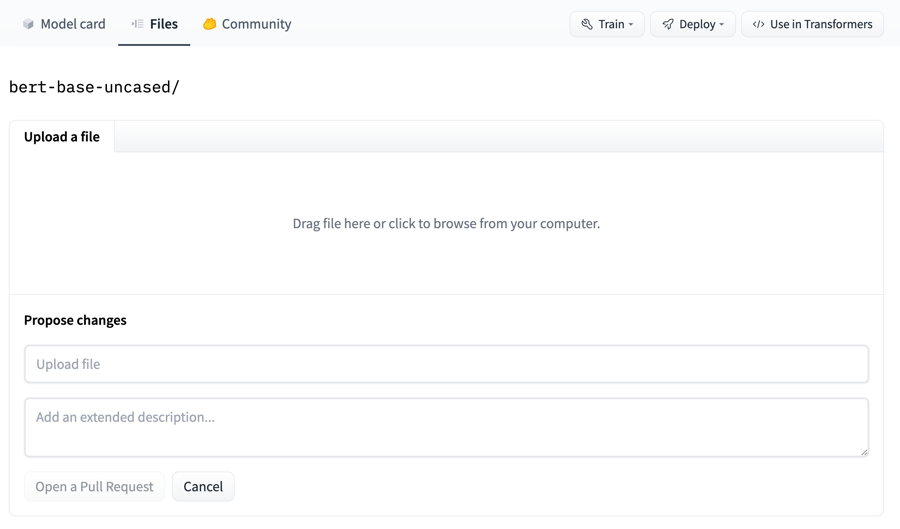
  1. Afterwards, click Commit changes to upload your model to the Hub!

  2. Inspect files and history

You can check your repository with all the recently added files!
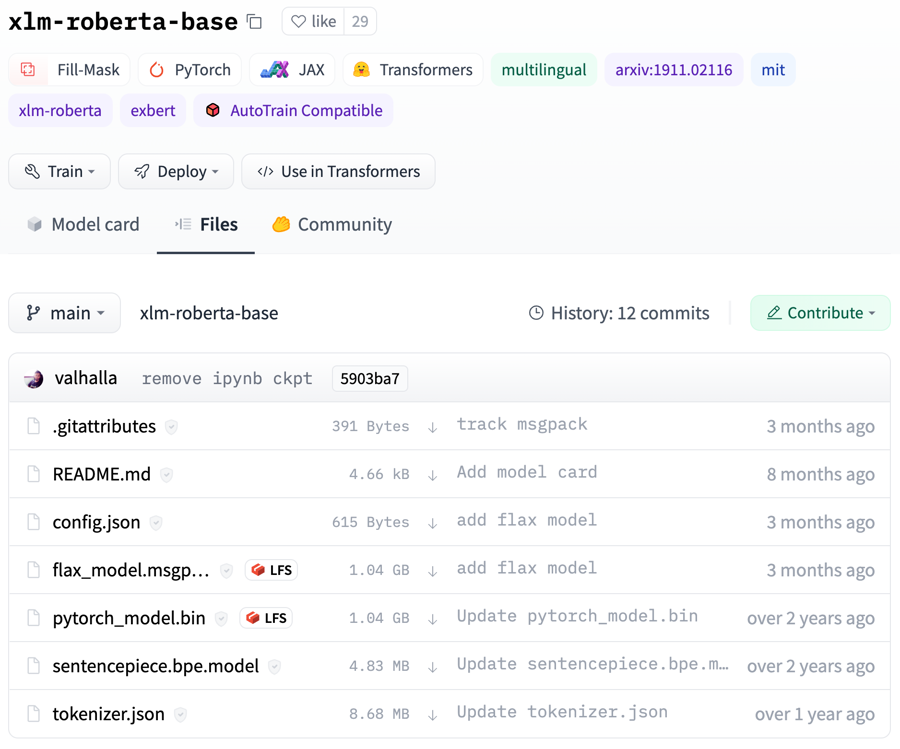
The UI allows you to explore the model files and commits and to see the diff introduced by each commit:

  1. Add metadata

You can add metadata to your model card. You can specify:

  • the type of task this model is for, enabling widgets and the Inference API.

  • the used library (transformers, spaCy, etc.)

  • the language

  • the dataset

  • metrics

  • license

  • a lot more!

  1. Add TensorBoard traces

Using Git

Using the boincai_hub client library

Read more about model tags .

Any repository that contains TensorBoard traces (filenames that contain tfevents) is categorized with the . As a convention, we suggest that you save traces under the runs/ subfolder. The “Training metrics” tab then makes it easy to review charts of the logged variables, like the loss or the accuracy.
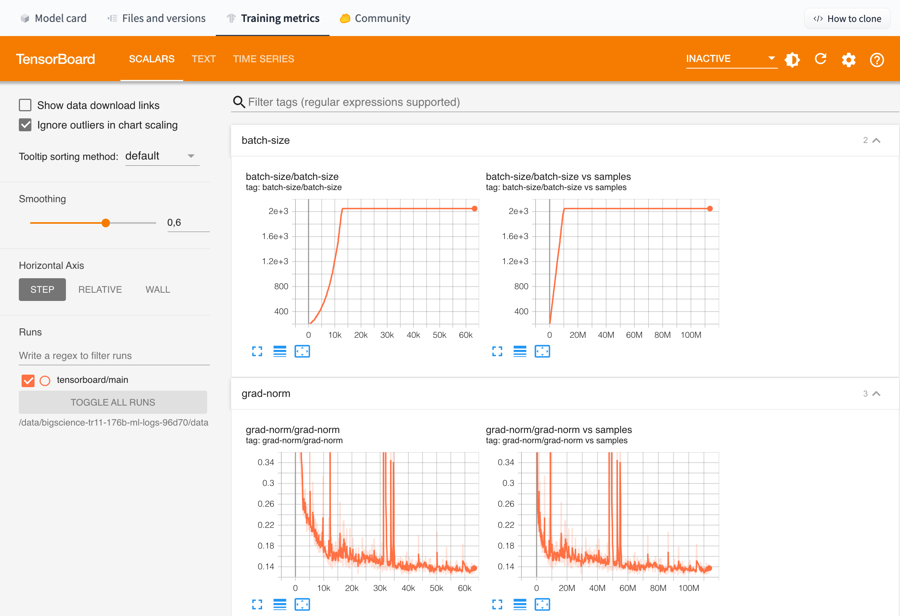
Models trained with 🌍 Transformers will generate by default if is installed.

Since model repos are just Git repositories, you can use Git to push your model files to the Hub. Follow the guide on to learn about using the git CLI to commit and push your models.

The rich feature set in the boincai_hub library allows you to manage repositories, including creating repos and uploading models to the Model Hub. Visit to learn more.

here
TensorBoard tag
TensorBoard traces
tensorboard
Getting Started with Repositories
the client library’s documentation
BOINC AI
Git-based repositories
osanseviero/fashion_brands_patterns
facebook/bart-large-xsum
here
Model Card
boincai/new