
Your first Docker Spaces
Your First Docker Space: Text Generation with T5
In the following sections, you’ll learn the basics of creating a Docker Space, configuring it, and deploying your code to it. We’ll create a Text Generation Space with Docker that’ll be used to demo the google/flan-t5-small model, which can generate text given some input text, using FastAPI as the server.
You can find a completed version of this hosted here.
Create a new Docker Space
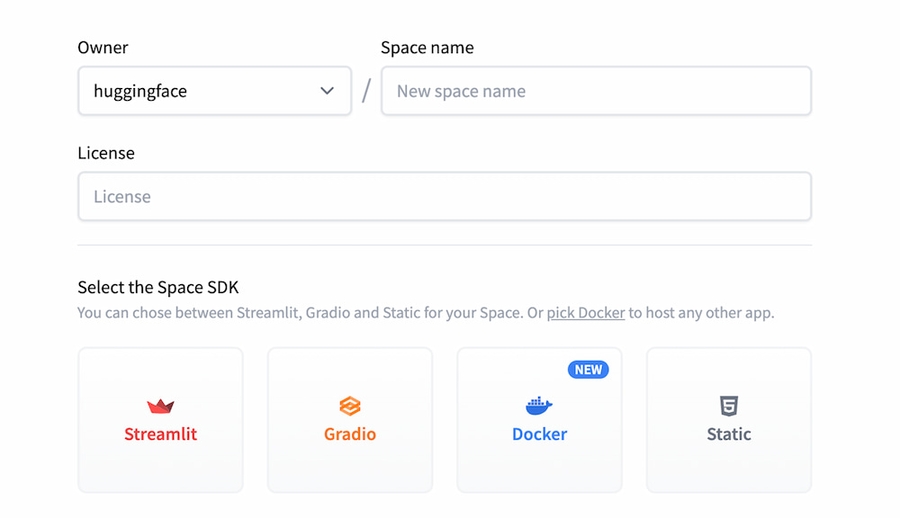
We’ll start by creating a brand new Space and choosing Docker as our SDK.
Hugging Face Spaces are Git repositories, meaning that you can work on your Space incrementally (and collaboratively) by pushing commits. Take a look at the Getting Started with Repositories guide to learn about how you can create and edit files before continuing. If you prefer to work with a UI, you can also do the work directly in the browser.
Selecting Docker as the SDK when creating a new Space will initialize your Docker Space by setting the sdk property to docker in your README.md file’s YAML block.
Copied
sdk: dockerYou have the option to change the default application port of your Space by setting the app_port property in your README.md file’s YAML block. The default port is 7860.
Copied
app_port: 7860Add the dependencies
For the Text Generation Space, we’ll be building a FastAPI app that showcases a text generation model called Flan T5. For the model inference, we’ll be using a BOINC AI Transformers pipeline to use the model. We need to start by installing a few dependencies. This can be done by creating a requirements.txt file in our repository, and adding the following dependencies to it:
Copied
These dependencies will be installed in the Dockerfile we’ll create later.
Create the app
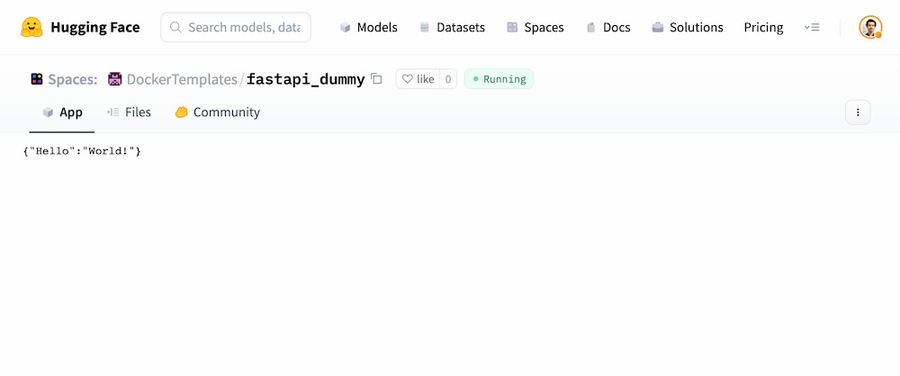
Let’s kick off the process with a dummy FastAPI app to see that we can get an endpoint working. The first step is to create an app file, in this case, we’ll call it main.py.
Copied
Create the Dockerfile
The main step for a Docker Space is creating a Dockerfile. You can read more about Dockerfiles here. Although we’re using FastAPI in this tutorial, Dockerfiles give great flexibility to users allowing you to build a new generation of ML demos. Let’s write the Dockerfile for our application
Copied
When the changes are saved, the Space will rebuild and your demo should be up after a couple of seconds! Here is an example result at this point.
Testing locally
Tip for power users (you can skip): If you’re developing locally, this is a good moment in which you can do docker build and docker run to debug locally, but it’s even easier to push the changes to the Hub and see how it looks like!
Copied
If you have Secrets you can use docker buildx and pass the secrets as build arguments
Copied
and run with docker run passing the secrets as environment variables
Copied
Adding some ML to our app
As mentioned before, the idea is to use a Flan T5 model for text generation. We’ll want to add some HTML and CSS for an input field, so let’s create a directory called static with index.html, style.css, and script.js files. At this moment, your file structure should look like this:
Copied
Let’s go through all the steps to make this working. We’ll skip some of the details of the CSS and HTML. You can find the whole code in the Files and versions tab of the DockerTemplates/fastapi_t5 Space.
Write the FastAPI endpoint to do inference
We’ll use the pipeline from transformers to load the google/flan-t5-small model. We’ll set an endpoint called infer_t5 that receives and input and outputs the result of the inference call
Copied
Write the
index.htmlto have a simple form containing the code of the page.
Copied
In the
app.pyfile, mount the static files and show the html file in the root route
Copied
In the
script.jsfile, make it handle the request
Copied
Grant permissions to the right directories
As discussed in the Permissions Section, the container runs with user ID 1000. That means that the Space might face permission issues. For example, transformers downloads and caches the models in the path under the HUGGINGFACE_HUB_CACHE path. The easiest way to solve this is to create a user with righ permissions and use it to run the container application. We can do this by adding the following lines to the Dockerfile.
Copied
The final Dockerfile should look like this:
Copied
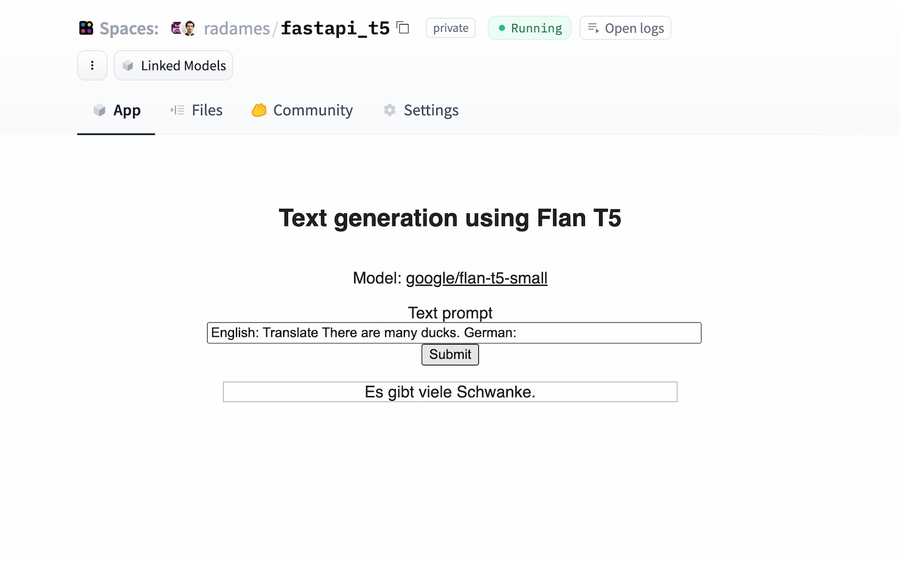
Success! Your app should be working now! Check out DockerTemplates/fastapi_t5 to see the final result.
What a journey! Please remember that Docker Spaces give you lots of freedom, so you’re not limited to use FastAPI. From a Go Endpoint to a Shiny App, the limit is the moon! Check out some official examples. You can also upgrade your Space to a GPU if needed 😃
Debugging
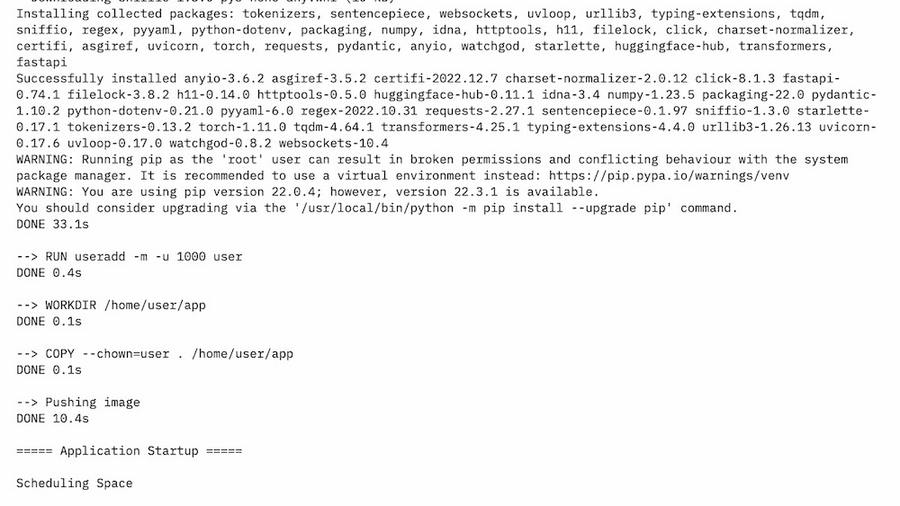
You can debug your Space by checking the Build and Container logs. Click on the Open Logs button to open the modal.

If everything went well, you will see Pushing Image and Scheduling Space on the Build tab
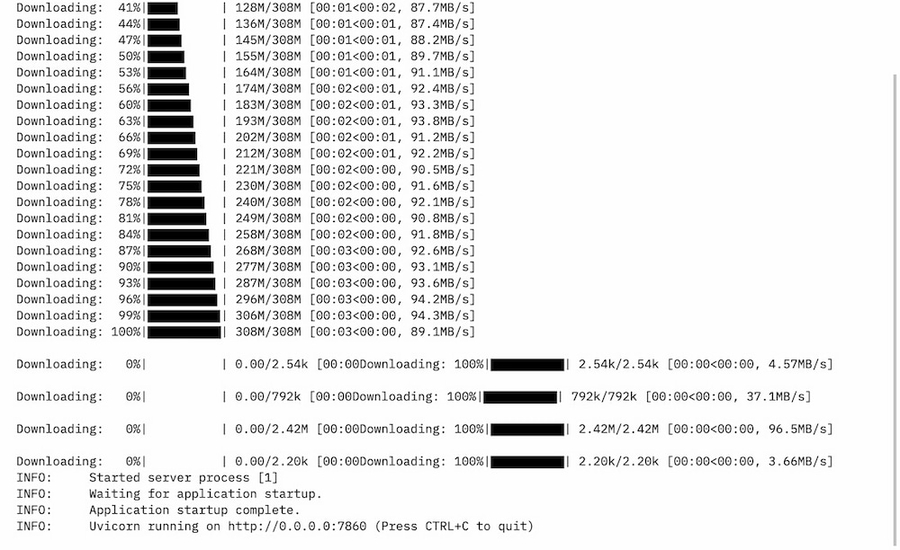
On the Container tab, you will see the application status, in this case, Uvicorn running on http://0.0.0.0:7860
Read More
Last updated